
Hoyas, also known as Wax Plants, are beloved for their thick, waxy leaves and fragrant flowers. These tropical plants thrive indoors with the right care, and one of the most crucial aspects of their care is the potting mix. Selecting the ideal potting mix can make all the difference in the health and growth of your hoya. In this guide, I’ll share everything I’ve learned from years of tending to these beauties, helping you create the perfect environment for your hoya to flourish.
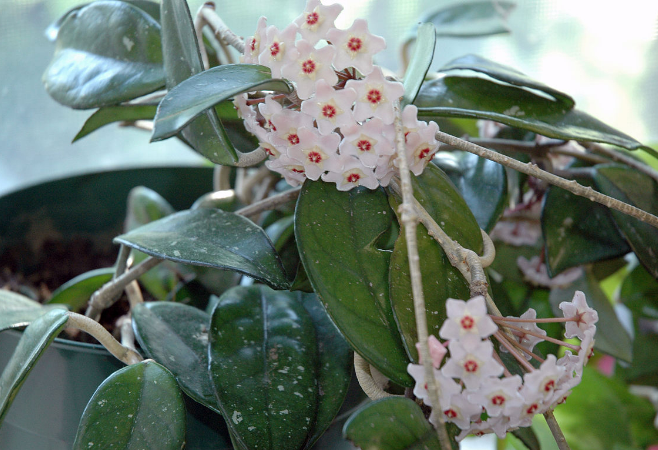
Understanding Hoya’s Natural Habitat
Hoyas are native to tropical and subtropical regions, where they grow as epiphytes, clinging to trees and absorbing nutrients from organic matter around them. This means that they’re accustomed to a loose, well-draining medium, which is something we need to replicate when growing them in pots.
Why Hoya Needs a Special Potting Mix
Hoyas are not like your average houseplants that can thrive in standard potting soil. They require a mix that provides excellent drainage while retaining just enough moisture. A proper potting mix prevents root rot, which is one of the most common issues hoya owners face.
Components of the Ideal Hoya Potting Mix
To create a potting mix that mimics their natural environment, consider combining several components:
Orchid Bark
Orchid bark is a fantastic base for hoya potting mix. It provides structure and aeration, allowing roots to breathe. I’ve found that my hoyas respond exceptionally well to the chunky texture of orchid bark, as it closely resembles the debris they’d naturally grow in.
Perlite
Perlite is another essential ingredient for hoya potting mix. This volcanic glass helps with drainage and prevents the mix from becoming too compacted. It’s particularly helpful for those of us who might be prone to overwatering.
Coconut Coir or Peat Moss
To retain some moisture, add coconut coir or peat moss. Both materials hold moisture without becoming waterlogged, which is crucial for maintaining the right balance. Personally, I prefer coconut coir because it’s more sustainable and has a similar texture to what hoyas would find in the wild.
Activated Charcoal
Activated charcoal helps to purify the soil, keeping it fresh and preventing the buildup of harmful bacteria. I like to add a small amount to my hoya mix as an extra measure to ensure the roots stay healthy.
Optional: Pumice or Lava Rock
If you’re looking to increase drainage even further, consider adding pumice or lava rock. These porous materials add weight to the mix and further improve aeration. In my experience, they’re particularly useful if your home tends to be more humid.
My Go-To Hoya Potting Mix Recipe
Over the years, I’ve experimented with various combinations and finally landed on a mix that my hoyas seem to love. Here’s the blend I use:
- 40% Orchid Bark
- 20% Perlite
- 20% Coconut Coir
- 10% Activated Charcoal
- 10% Pumice or Lava Rock
This combination offers a well-draining, aerated environment that retains just the right amount of moisture.
Repotting Your Hoya: When and How
When to Repot
Hoyas prefer being slightly root-bound, so you don’t need to repot them frequently. I usually repot mine every 2-3 years or when I notice the roots starting to outgrow their current pot. Spring and early summer are the best times to repot, as this is when the plants are actively growing.
Steps to Repotting
- Prepare Your Potting Mix: Mix the ingredients thoroughly before starting.
- Choose the Right Pot: Pick a pot that’s just slightly larger than the current one. Make sure it has drainage holes.
- Remove the Hoya Gently: Tap the sides of the current pot to loosen the soil, then gently remove the hoya. Be careful not to damage the roots.
- Prune the Roots: If you notice any rotting or excessively long roots, prune them back.
- Place the Hoya in the New Pot: Add a layer of potting mix to the bottom, place the hoya in the center, and fill in around the roots with more mix.
- Water Lightly: After repotting, water the hoya lightly to help the soil settle.
Common Issues with Hoya Potting Mix and How to Solve Them
Poor Drainage
If you notice water sitting on top of the soil or your plant’s roots staying too wet, your mix may not be draining properly. To fix this, consider adding more perlite or orchid bark to improve aeration.
Soil Compaction
Over time, the potting mix can compact, reducing airflow to the roots. If this happens, it might be time to refresh the mix with new components.
Root Rot
Root rot is often caused by overwatering or poor drainage. If you suspect your hoya has root rot, remove the plant from the pot, prune away the affected roots, and repot it in fresh, well-draining mix.
My Final Thoughts on Hoya Potting Mix
As an avid hoya enthusiast, I’ve found that the right potting mix can significantly impact the health and growth of these plants. By mimicking their natural habitat and ensuring proper drainage and aeration, you can help your hoyas thrive for years to come.
Remember, creating the perfect potting mix for your hoya is a bit of trial and error, so don’t be afraid to experiment and adjust based on your plant’s needs. Happy gardening!
