
Ah, the sight of a well-striped lawn—now that’s the suburban dream, isn’t it? Just like the criss-cross pattern on a freshly baked pie, those neat lines bring an extra sprinkle of pizzazz to your outdoor space. Lawn striping is not just a pastime but an art, a delicate ballet of man and mower dancing across the stage we call a backyard.
“But wait,” you might say, “don’t you need one of those fancy-pants striping kits to achieve that velvety masterpiece?” I’m here to tell you that no, you don’t need to splurge on professional gadgets to get those coveted lines. With some know-how, a dash of creativity, and a sprinkle of elbow grease, you too can make your neighbors go green with lawn envy.

Tools You Will Need
Before we take a jolly stroll down Stripe Avenue, let’s make sure you’ve got all your ducks in a row—or in this case, all your tools in the shed. Preparation is key, and you don’t want to be that person who realizes halfway through the dance that they’ve got two left feet… or in our case, a missing mower blade.
Mower
First things first, you’re going to need a mower. Surprising, I know. But not just any mower will do! Make sure it’s in good condition with sharp blades. A dull blade will shred your grass rather than cut it cleanly, making it harder to achieve that crisp stripe.
Roller (Optional)
If you’re looking to add an extra dash of drama to your stripes, consider investing in a roller. While not mandatory, it’s the cherry on top for lawn connoisseurs who really want their yard to scream, “Look at me, I’m fabulous!”
Measuring Tape
Precision is the name of the game. To keep your lines as straight as an arrow, a measuring tape is indispensable. Trust me, eyeballing it just won’t do. Unless you’ve got a laser-guided vision, but that’s a story for another day.
Spray Paint for Marking or Flags
Last but not least, some spray paint for marking or flags. This will help you map out your battlefield—I mean lawn—so you know exactly where those stripes are going to go. Choose a color that’ll contrast well with your lawn but won’t clash with your garden gnome collection.
Preparing Your Lawn
Ah, preparation—the unsung hero of any successful venture. In the culinary world, chefs have a saying: “mise en place,” which translates to “everything in its place.” Consider this the “mise en lawn” of your striping journey. Let’s dive into the details, shall we?
Mowing Height
The secret sauce to vivid, eye-catching stripes is actually the height at which you mow your grass. Too low, and you risk scalping the lawn, leaving it as patchy as a teenager’s beard. Too high, and your lawn starts to look more like a meadow, hiding those beautiful stripes you’re working so hard to achieve.
The optimal height largely depends on the type of grass you have. For cool-season grasses like Kentucky Bluegrass or Fescue, aim for a height between 2.5 to 3.5 inches. For warm-season varieties like Bermuda or Zoysia, a height of 1 to 2 inches should do the trick.
Cleaning the Lawn
No artist starts with a dirty canvas, and neither should you. Before you even think about firing up that mower, make sure to clean your lawn. Use a rake, leaf blower, or your hands (if you’re feeling particularly in touch with Mother Earth) to remove any debris, twigs, rocks, or lost toys that might be lying around.
- Debris: Leaves and small twigs can get caught in your mower and disrupt your pattern.
- Rocks: Not only can these dull your mower blade, but they can also turn into dangerous projectiles.
- Miscellaneous Items: Whether it’s a stray frisbee or your child’s forgotten action figure, clear it out to ensure smooth sailing—or in this case, smooth mowing.
By the end of your cleaning, your lawn should look as pristine as a fresh snowfall, ready for your mower’s grand performance.
Creating the Stripes
Here we are, folks—the moment you’ve been waiting for! Like a conductor ready to lead an orchestra, you stand at the edge of your lawn, tools in hand, ready to make magic happen. With a grand sweep of your arm, you… start the lawnmower. Okay, it’s not as romantic, but it’s every bit as epic in my book.
Technique 1: The Push Mower Method
The trusty push mower—your partner in grime… I mean, prime lawn care. Here’s how you get those stripes using nothing but your basic mower.
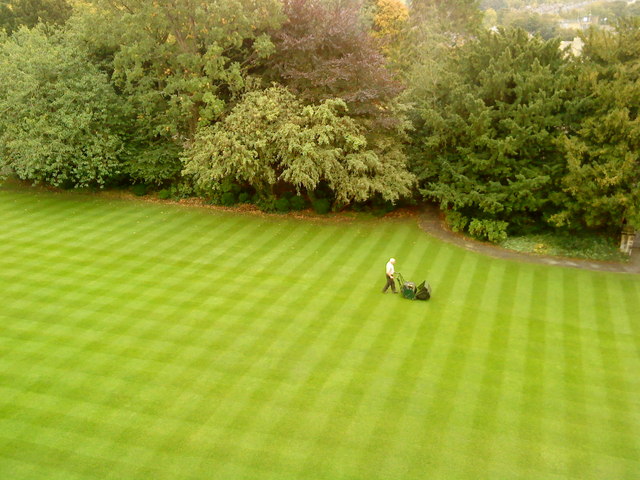
- Plan Your Route: Start by mowing a straight line along the edge of your lawn. This will act as your guiding line.
- Mow Away: Push your mower in a straight line, away from your initial edge.
- Turn and Burn: At the end of the line, make a U-turn and mow a parallel line back toward the edge. The trick here is to slightly overlap with your previous stripe.
- Repeat: Keep alternating directions until your lawn is completely mowed.
Pro-tip: The sharper the turn, the crisper your lines will be. So, channel your inner race car driver and make those turns count!
Technique 2: Using a Roller
Ah, the roller—the limousine of lawn care. If you’ve got one, here’s how you can add a touch of luxury to your stripes.

- Follow Your Mower: Simply attach the roller to your mower if it’s not already integrated.
- Mow as Usual: The roller will automatically bend the grass as you go along, intensifying the stripe effect.
Pro-tip: The heavier the roller, the more pronounced your stripes will be. Choose your roller weight wisely!
Technique 3: Mower + Broom
No roller? No problem! All you need is a good ol’ broom to manually bend the grass blades.
- Mow First: Complete your mowing using the Push Mower Method.
- Sweep Time: Take your broom and gently sweep the grass in the direction you want the stripes to go.
- Fine-Tuning: Walk backwards while sweeping to avoid stepping on your freshly “broomed” stripes.
Pro-tip: A softer broom will bend the grass without damaging it. So maybe save the wire brush for the patio.
Technique 4: Using Weight
Want to add a little gravitas to your stripes? You can by adding weight to the back of your mower.
- Attach Weights: Use sandbags or other heavy objects and securely attach them to the back of your mower.
- Mow as Usual: The added weight will naturally bend the grass as you mow.
Pro-tip: Make sure to balance the weights evenly to avoid veering off course. It’s lawn striping, not drift racing!
Tips for Maintaining Your Striped Lawn
Congratulations! You’ve just crafted a lawn so stunning, even the local garden club will be knocking on your door for secrets. But we’re not quite done yet. To keep your lawn looking like it just walked off the runway, a bit of maintenance is in order. Ready for some top-tier tips? Let’s go!
How Often Should You Mow?
Ah, frequency—a delicate balancing act. Mow too often, and you might as well roll out the welcome mat for weeds and pests. Mow too rarely, and you’ll lose those sharp stripes in a jungle of overgrowth.
- Cool-Season Grass: If you’ve got cool-season grass like Kentucky Bluegrass or Fescue, aim to mow every 5 to 7 days during peak growth.
- Warm-Season Grass: For warm-season types like Bermuda or Zoysia, you’re looking at every 7 to 10 days.
Watering Practices
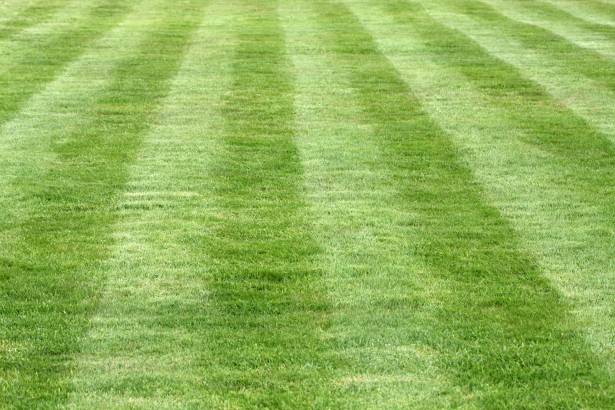
Water: it’s not just for keeping you hydrated during your mowing marathon. Proper watering is essential to keep those stripes looking crisp and vibrant.
- Morning Hours: The best time to water is in the early morning when the air is cooler. This minimizes evaporation.
- Deep and Infrequent: Rather than light, frequent watering, aim for deeper, less frequent sessions to encourage strong root growth.
Troubleshooting Common Problems
Like any good adventure, your path to a striped lawn might come with a few plot twists. Fear not, for here are your solutions!
Uneven Stripes
Did your stripes come out looking like they had one too many? The culprit might be a wobbly hand or a misaligned mower deck. Double-check your equipment and try to maintain a steady pace.
Fading Stripes
Noticed your stripes have lost their luster? Time for some moisture! A lack of water can quickly dull the appearance of your stripes. Follow the ideal watering practices mentioned above.
Stripes Not Showing
Tried everything and still can’t see those stripes? You might be mowing too high or too low. Refer back to our section on mowing height for your specific grass type.
| Problem | Possible Cause | Solution |
|---|---|---|
| Uneven Stripes | Wobbly hand, misaligned mower deck | Check equipment, maintain steady pace |
| Fading Stripes | Lack of moisture | Water according to ideal practices |
| Stripes Not Showing | Incorrect mowing height | Refer to optimal mowing height for your grass |
Comprehensive Q&A
Ah, questions—the breadcrumbs on the path to enlightenment. I know you’ve got some, and I’ve got the answers. Let’s delve into the FAQs of DIY lawn striping, shall we?
Q: Do certain types of grass stripe better than others?
Answer: Oh, you betcha! Grasses like Kentucky Bluegrass, Fescue, and Ryegrass are the Hollywood A-listers of lawn striping. Their blades are more flexible and tend to bend more easily, making the stripes more visible. Warm-season grasses like Bermuda and Zoysia can still strut their stuff, but the stripes might not be as vivid.
Q: Can I create more complex patterns?
Answer: The sky’s the limit! Or in this case, the edge of your lawn. Once you’ve mastered the basics, you can play around with zig-zags, spirals, and even criss-cross patterns. The key here is planning—map out your design beforehand to avoid ending up with a lawn labyrinth.
Q: How long will the stripes last?
Answer: Longevity varies based on grass type, mowing frequency, and weather conditions. Generally, you can expect your stripes to last for about a week, give or take. If you mow frequently, you’ll have to re-stripe to keep things looking fresh.
Q: Does striping harm the lawn?
Answer: When done correctly, striping is as harmless to your lawn as a sunflower is to a sunny day. The technique merely bends the grass blades, and they’ll naturally straighten up over time. Just avoid excessive weight or extreme bending to keep things on the up-and-up.
Q: Can I stripe my lawn in both directions?
Answer: For the bold and the brave, cross-striping is an option. You’ll create an exciting checkerboard pattern, which looks fabulously complicated but is surprisingly simple to achieve. Simply stripe your lawn in one direction, then go over it perpendicularly. Voila—visual intrigue at its finest!

Well, there you have it, folks—a DIY guide that transforms your ordinary lawn into a striped wonder without requiring a specialized kit. All it takes is a little elbow grease, a sprinkle of know-how, and the will to make your neighbors green with lawn envy.
So go ahead, release your inner landscape artist. With these steps and tips, you’re well on your way to creating a lawn that not only looks professionally done but also sings a glorious, green aria every time you step outside.
