
Are you a food enthusiast, eager to add fresh flavors to your homemade meals? Or perhaps a nature lover, looking to infuse some greenery into your home? If you answered “yes” to either of these questions, you’re in the right place! Creating a herb garden in your kitchen is a fun, rewarding, and incredibly flavorful endeavor.

Step 1: Choose Your Space (and Light it Up!)
The first thing you need to consider when creating a kitchen herb garden is where exactly your little green friends will call home. Your herbs need at least six hours of sunlight a day, so a kitchen windowsill that gets ample sunlight is the perfect spot.
Pro tip: Don’t have a sunny windowsill? Don’t worry! That doesn’t mean you’re destined for a herb-less life. You can invest in a grow light for your indoor garden. These specially designed lights provide all the wavelengths your plants need to thrive.
Step 2: Selecting Your Herbs
Choosing the right herbs for your indoor garden is like casting characters for a movie; each one plays a unique role that contributes to the overall success of your kitchen herb garden. Let’s delve into the advantages of each plant for indoor cultivation:
- Basil: A superstar in the kitchen, basil is relatively easy to grow indoors. Its pleasing aroma can be a delightful addition to your kitchen. The plant loves warm conditions and bright light, so a sunny kitchen windowsill is the perfect spot for it.
- Parsley: This versatile herb is a slow starter but once it gets going, it becomes a steady provider of flavor for your meals. Parsley enjoys bright light and cooler temperatures, making it a good choice if your kitchen doesn’t get quite as warm.
- Thyme: Thyme is a resilient herb that can easily adapt to indoor conditions. It doesn’t require a lot of watering and prefers well-drained soil, making it a great low-maintenance choice.
- Mint: Growing mint in a container can save you from its invasive nature in an outdoor garden. Its refreshing aroma and flavor can be a great addition to your meals and drinks. Mint is also incredibly easy to grow, loving indirect light and plenty of water.
- Chives: If you’re seeking a herb that can withstand lower light conditions, chives might be your pick. They are resilient and can grow back even after heavy harvesting.
- Rosemary: This Mediterranean herb is drought-tolerant, making it forgiving to occasional forgetfulness in watering. The strong, piney flavor of rosemary can level up various dishes.
- Cilantro: Though it’s a short-lived plant, cilantro grows quickly and you can harvest it frequently. It prefers cooler temperatures, so if your kitchen isn’t constantly bathed in warm sunlight, cilantro might be a good choice.
- Dill: Like cilantro, dill is a fast grower and you can expect to start harvesting in just about eight weeks. It’s delicate, fern-like leaves can provide a nice aesthetic touch to your kitchen.
- Oregano: Oregano is a hearty, forgiving herb that is perfect for beginners. It requires minimal watering and is resistant to most pests, ensuring a stress-free growing experience.
Step 3: Planting Your Herbs
It’s time to get your hands dirty! Well, not too dirty – we’re gardening indoors after all. Here’s a quick and easy guide on how to plant your herbs:

- Choose your containers: Herbs love good drainage, so pots with holes at the bottom are your best bet. They also come with the bonus of not turning your kitchen into a miniature lake.
- Potting mix: Get a high-quality potting mix designed for indoor plants. Your herbs deserve only the best!
- Planting: Make a small hole in the potting mix and gently place your herb plant or seed in. Cover the roots or seed with the mix.
- Watering: Water your plants but remember not to drown them!
Here is a simple table to illustrate how often you should water most common kitchen herbs:
| Herb | Watering Frequency |
|---|---|
| Basil | Once every 1-2 days |
| Parsley | Once every 2-3 days |
| Thyme | Once every 10-14 days |
| Mint | Once every 1-2 days |
| Chives | Once every 2-3 days |
| Rosemary | Once every 1-2 weeks |
| Cilantro | Once every 3-4 days |
| Dill | Once every 3-4 days |
| Oregano | Once every 1-2 weeks |
And now a little more detail on each point
3.1 Choose Your Containers
Your herb’s home – the container – plays a critical role in the success of your indoor garden. But with an array of options out there, how do you choose? Let’s break down the advantages and disadvantages of different types:
- Terracotta Pots: This classic choice is known for its porous nature, which allows excess moisture to escape, reducing the risk of overwatering. However, this feature might lead to quicker drying of the soil, requiring more frequent watering. Terracotta pots are also prone to breakage and might be a bit heavy.
- Plastic Pots: Light, durable, and affordable, plastic pots are a great option for beginners. They retain moisture well, which can be a boon for those herbs that enjoy damp soil. On the flip side, plastic does not breathe like terracotta, meaning you need to be careful to avoid waterlogging your plants.
- Ceramic or Glazed Pots: These pots can add a decorative touch to your kitchen herb garden. They hold moisture better than terracotta pots but still provide some breathability. The downside is that they can be quite heavy and more prone to breaking.
- Metal Pots: While they can bring a sleek, modern aesthetic to your kitchen, metal pots can heat up quickly which may damage the roots. If you opt for metal, consider placing the plant in a plastic pot first, and then putting that inside the metal one.
- Glass Containers: They offer a unique aesthetic appeal and allow you to view the progress of your plant’s roots. However, without proper drainage, glass containers can easily cause waterlogged soil. They might be better suited for water-loving herbs like mint.
- Self-Watering Pots: These containers are designed with a reservoir to provide a consistent supply of water to your herbs. They are a great choice if you’re away frequently or tend to forget watering. However, they are usually more expensive and not all herbs appreciate constant moisture.
Remember, no matter what material you choose, ensure your container has adequate drainage holes. Herbs love a good drink, but they certainly don’t want to swim!
3.2 Potting Mix
Selecting the perfect potting mix can feel like a search for the perfect mattress. It needs to provide support, facilitate drainage, and ensure your plants are comfortable. Let’s dive into the world of potting mixes and discover the benefits and drawbacks of each:
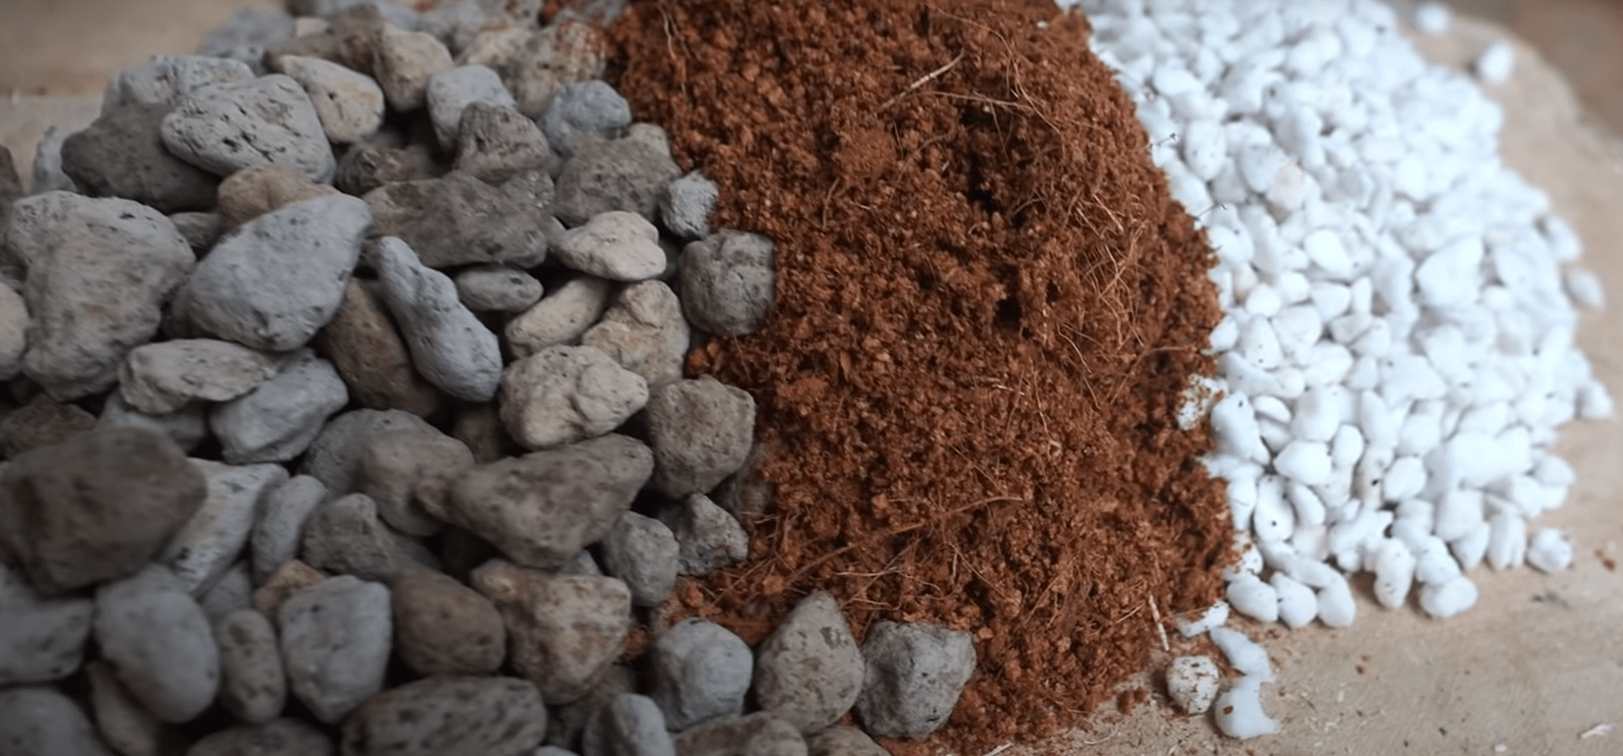
- All-Purpose Potting Soil: A jack-of-all-trades, this potting soil offers a balanced mix of materials designed to support a wide range of plants. It usually contains peat moss, compost, and perlite or vermiculite for good drainage. However, since it’s designed to accommodate various plants, it might not cater to the specific needs of some herbs.Suitable for: Basil, Parsley, Thyme, Chives, Dill
- Cactus Mix: Despite the name, this mix isn’t exclusively for cacti. It provides excellent drainage, making it ideal for herbs that don’t like wet feet. Its sandy texture helps prevent waterlogging but might require more frequent watering as it dries out quickly.Suitable for: Rosemary, Thyme, Oregano
- Seed Starting Mix: This mix is designed to give seeds the best start in life. It’s lightweight and free from chunks, making it easy for seeds to push through. It’s sterile, reducing the risk of seed-borne diseases. However, once the herbs are established, they may need to be repotted in a nutrient-rich mix.Suitable for: All herbs when starting from seeds
- Organic Potting Mix: Made from composted bark, coir, and green waste, this is a peat-free and environmentally-friendly alternative. It offers a slow release of nutrients over time. However, it might be more expensive and its heavier weight could be a downside for indoor plants.Suitable for: Basil, Parsley, Chives, Cilantro, Dill
- Self-Watering Soil: Infused with water-retaining crystals, this soil can hold water for longer periods, reducing the frequency of watering. Great for those forgetful gardeners! But caution is required as over-watering can lead to root rot.Suitable for: Mint, Basil, Parsley
Step 4: Taking Care of Your Herbs
Even though you’ve successfully planted your herbs, your job isn’t over yet! You need to take care of them. Some herbs might be needy, requiring a little extra love and care, while others are more independent and can handle a bit of neglect (I’m looking at you, rosemary).
- Water: Refer to the table above for watering frequency.
- Pruning: Regular pruning encourages fuller growth. Plus, it gives you a regular supply of fresh herbs!
- Fertilizer: Feed your plants every few weeks with an all-purpose plant food. They need to eat too!
Step 5: Enjoy Your Fresh Herbs
The final step – the best one in my opinion – is to enjoy the fruits (or rather, herbs) of your labor. Use your fresh herbs in cooking, as garnish, or even for a fresh herbal tea!
Herb gardening in your kitchen isn’t just a hobby, it’s a lifestyle. A fragrant, flavorful lifestyle that transforms your cooking and brings you closer to nature, all while staying in the comfort of your own home.
In the immortal words of Bob Marley (with a slight twist), “Herb is the healing of a nation.” So, why not bring some of that healing into your kitchen? Happy gardening!
Disclaimer: A herb garden in your kitchen will make your meals taste so good, your friends might start calling you Chef. Don’t say we didn’t warn you!
