
Ah, tulips! Those vibrant, cheerful harbingers of spring that can brighten even the gloomiest day. But what if I told you that you don’t have to wait for spring to enjoy their radiant splendor? Enter the magic of forcing tulip bulbs indoors.
Forcing bulbs might sound like we’re persuading these little gems to give us flowers by sheer willpower. But, in reality, it’s about creating optimal conditions for bulbs to break their dormancy and grace us with their blooms, no matter what the season outside is yelling. (Or snowing. Or raining cats and dogs.)
Beyond just the sheer joy of having vibrant tulips amidst a snowstorm outside, forcing bulbs indoors lets us have year-round floral displays, setting a continuous festive mood. After all, why should we let Mother Nature have all the fun dictating when we get to enjoy our favorite blooms? Let’s delve into the art and science of this practice and sprinkle some year-round floral cheer in our homes.

What is Bulb Forcing?
Let’s break down that curious term, shall we?
Bulb Forcing is not about making our green little friends do our bidding against their will. Instead, it’s a specialized gardening technique that tricks bulbs into thinking it’s their time to shine – even if it’s the dead of winter outside. Simply put, we’re manipulating the bulb’s natural lifecycle so that they bloom earlier than they would if left to the rhythms of Mother Nature. It’s a little nudge (or maybe a gentle whisper) to the bulb, saying, “Hey there, fancy waking up early this year?”
Benefits of Forcing Bulbs:
- Year-round Blooms: Who doesn’t like tulips in December or January? Brighten up winter days by having spring in your living room.
- Flexibility: Plan for special occasions. Want tulips on your table for that mid-November dinner party? You got it!
- Learning Opportunity: Dive deep into the world of botany. Understand how bulbs work and the conditions they need to thrive. It’s like giving them a cozy bed, blanket, and hot cocoa (metaphorically speaking, of course!).
- Therapeutic Benefits: Gardening, in any form, is therapeutic. Forcing bulbs can be especially so, as you witness life and color sprout in the bleakest of seasons.
- Aesthetic Appeal: Tulips can be the centerpiece of your interior décor. They add vibrancy, freshness, and a touch of nature to any room.
Choosing the Right Tulip Bulbs
Alright, budding bulb enthusiasts (pun definitely intended), let’s get into the heart of the matter: picking the perfect bulbs. Because, as with many things in life – from chocolates to life partners – quality matters!
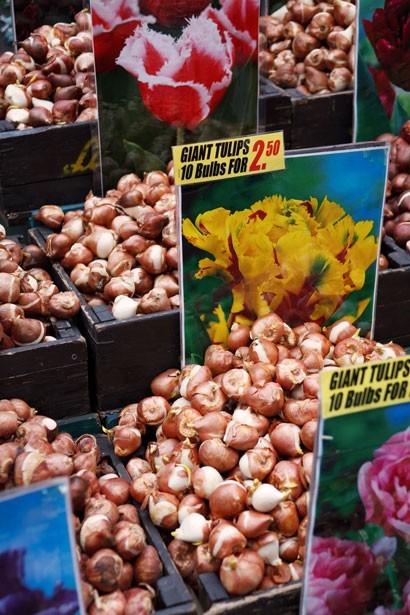
1. Importance of Quality and Health of Bulbs
Just as a chef picks only the finest ingredients to whip up a culinary masterpiece, your tulip-forcing journey should begin with choosing the healthiest and most robust bulbs. A bulb is the storage unit of a plant, holding all the nutrients and energy needed for it to grow and bloom. When we talk about the health of a bulb, we’re essentially talking about its vitality, its zest for life, its inner “oomph!” A healthy bulb promises vibrant blooms and reduces the chance of disease or failure.
Tips for Spotting Healthy Bulbs:
- Firmness: Give the bulb a gentle squeeze. It should feel firm, not soft or squishy.
- Clean Surface: Look for bulbs free from mold, spots, or other blemishes.
- Size Matters: Generally, larger bulbs have more stored energy, which can translate into bigger and brighter blooms.
2. Types of Tulip Bulbs Best Suited for Forcing
While most tulips are showy and elegant, not all are equally suited for the indoor concert of forced blooming. Here’s a standing ovation for some crowd favorites:
- ‘Early Harvest’: Reddish-orange in color and can bloom as early as January!
- ‘Christmas Marvel’: Lovely pink blooms to dazzle your indoors.
- ‘Johann Strauss’: A beautiful concoction of white and soft pink petals.
- ‘Attila’: A rich, purple beauty that’s both regal and captivating.
These varieties, among others, have proven to be more adaptable and responsive to indoor forcing, making them a safer bet for novices and seasoned gardeners alike.
3. Where to Buy Healthy Bulbs
Venturing out to get your bulbs is akin to a treasure hunt. And like all treasure hunts, knowing where to look is half the battle.
- Local Nurseries: A good nursery is often a haven for healthy bulbs. Plus, you get the added advantage of speaking to experts and getting hands-on advice.
- Specialized Bulb Retailers: There are stores dedicated solely to bulbs (talk about niche!). They often have a broader range and higher quality bulbs.
- Online Stores: The digital age brings bulbs to your doorstep! But, make sure to buy from reputable sellers and check customer reviews.
- Gardening Clubs or Societies: Joining a gardening club can offer a treasure trove of information, swap events, and insider tips on where to get the best bulbs in town.
Preparation for Forcing
Before you dive into the world of forcing tulips, take a moment to prep. Just as a painter arranges his brushes and paints, or a chef gathers ingredients, you too will need to get all your ducks (or should I say bulbs?) in a row. Let’s roll up those sleeves and set the stage for a spectacular floral show!
1. Cleaning and Inspecting Bulbs
Once you’ve got your bulbs home, it’s a bit like bringing home a new puppy – you want to check them over, give them a gentle cleaning, and ensure they’re fit and healthy.
- Inspecting: Look over each bulb once again for any signs of disease, mold, or damage. A bulb in poor condition can affect others when planted together, much like one bad apple in a barrel.
- Cleaning: Using a soft cloth, gently brush off any loose soil or debris from the bulb. If you find any soft spots, it’s best to discard that bulb.
2. Tools and Materials Needed
The right tools can make your bulb forcing journey smoother and more enjoyable. Think of it as equipping yourself for a mini gardening adventure, indoors!
Here’s a checklist of what you’ll need:
- Pots: Choose pots with drainage holes to prevent waterlogging. They should be deep enough to accommodate the bulbs and the roots they’ll grow. Aim for pots that are 4-6 inches deep.
- Soil: Opt for a well-draining potting mix. This ensures that your bulbs have an optimal environment for growth without risking rot.
- Water: Good old H2O. This will be used to water the bulbs once they’re potted. Remember, tulips don’t like soggy feet, so ensure you water judiciously.
- Labels or Markers: Especially useful if you’re planting different varieties. Label each pot to keep track of which tulip will surprise you with its blooms.
- Tray or Saucer: To place under your pots and catch any excess water. This will keep Aunt Mabel’s antique wooden table safe from water stains!
- Gloves: To keep your hands clean and protect them while handling soil and bulbs.
- A Trowel or Spoon: For transferring and adjusting soil in the pot.
Steps to Force Tulip Bulbs Indoors

Welcome to the grand stage of bulb forcing! Now that our tools are gathered and our bulbs are prepped, let’s march into the main event, step by step. And remember, every great masterpiece unfolds one brushstroke at a time, so patience and care are our best allies. Let’s dive in, shall we?
Step 1: Chilling the Bulbs
Why Chilling?
Tulip bulbs aren’t just pretty faces; they’re hardwired for a winter nap. Chilling mimics the cold period they would naturally experience outdoors, preparing them for their grand bloom.
Chill Duration and Temperature:
- Duration: 12-16 weeks of cold treatment. Yes, it sounds like a long spa retreat, but trust me, it’s worth the wait!
- Temperature: Aim for a chilly 35°F to 48°F (2°C to 9°C). Too cold and they might freeze, too warm and they might wake up confused!
Step 2: Potting the Bulbs
Soil and Pot Size:
- Soil: A well-draining potting mix is your best bet.
- Pot Size: Aim for pots that are about 4-6 inches deep, ensuring room for both bulbs and budding roots.
Planting Depth and Spacing:
- Depth: Plant bulbs so their tips are just below the surface.
- Spacing: Position bulbs close but not touching. It’s a little get-together, not a squished elevator ride!
Step 3: Initial Watering and Placing
Watering:
- Amount: Water until the soil is moist but not soggy. Think of a well-wrung-out sponge.
- Frequency: Keep the soil consistently moist but avoid overwatering.
Placement:
Position the pots in a cool, dark place during their chilling phase. A basement or a fridge drawer (away from fruits) works wonders.
Step 4: Monitoring Growth
Growth Phase Expectations:
You’ll first notice roots, followed by green shoots emerging.
Adjusting Light and Temperature:
Once shoots appear, move pots to a slightly warmer spot (still cool) with indirect light.
Step 5: Bringing into Full Light
When and Why:
Once the shoots are a few inches tall, it’s showtime! Move them to a brighter spot to encourage blooming.
Light Requirements:
Place in a location with bright, indirect light. A sunny window with some shading is perfect. Avoid direct afternoon sunlight to prevent scorching.
Step 6: Care after Blooming
Maintaining Blooms:
Keep the tulips away from direct heat sources and drafts to prolong their beauty. Rotate the pot occasionally for even growth.
Post-Blooming Bulb Care:
Once your tulips have sung their floral song, you can either compost the bulbs or plant them outdoors, though they may or may not bloom the next year. If feeling experimental, give them a spot in the garden and wait for a possible encore next spring!
Common Mistakes to Avoid
Ah, the realm of mistakes. We’ve all been there, haven’t we? Sometimes, our green fingers turn a shade of, well, brown. But fret not! Gardening, like life, is all about learning from our missteps. So, before you set out on your tulip-licious journey, let’s discuss a few pitfalls to steer clear of. A stitch in time saves nine, after all! Or in our case, a tip in time saves… your tulip line? Okay, let’s get to it!
1. The Watering Woes: Overwatering or Underwatering
Overwatering:
Think of your tulip bulbs as the Goldilocks of the plant world; they like their soil just right – not too wet, not too dry. Overwatering can make the soil a sopping mess, leading to bulb rot.
How to Avoid:
- Use pots with drainage holes.
- Water when the top inch of soil feels dry.
- Always water with the “less is more” principle in mind and adjust based on the plant’s response.
Underwatering:
While tulips aren’t fans of waterlogged soil, they also don’t fancy a drought. Dry soil can cause bulbs to shrivel and decrease blooming potential.
How to Avoid:
- Stick your finger into the soil up to an inch. If it’s dry, it’s time to water.
- Setting reminders on your phone or calendar can help maintain consistency.
2. Chill Chill, Just Not Too Much: Incorrect Chilling Duration or Temperature
Duration Mishaps:
Chill too little, and the bulbs won’t bloom. Chill too much, and they might sprout prematurely.
How to Avoid:
- Mark the start and end date of chilling on your calendar.
- Check occasionally for signs of sprouting.
Temperature Tumbles:
If your bulbs freeze, they might get damaged. Too warm, and they might get tricked into thinking spring has sprung!
How to Avoid:
- Use a thermometer if you’re chilling bulbs in a fridge or cold room to monitor the temperature.
- Keep them away from the freezer compartment.
3. It’s Not a Bulb Party: Overcrowding of Bulbs
While bulbs are social creatures, they aren’t fond of being squashed together. Overcrowding can lead to poor air circulation and increased disease risk.
How to Avoid:
- Always maintain a little space between bulbs when potting.
- Remember, they need room to grow roots and shoots without competing for space.
Questions and Answers
Ah, the inquisitive gardener! As you embark on this tulip-tinged journey, questions might pop up like spring blossoms. Let’s tackle some of the most common curiosities, and maybe even answer a few you hadn’t thought of yet!
Q1: Can I force tulip bulbs more than once?
Answer: Typically, once a tulip bulb has been forced, it’s exhausted a lot of its energy and may not bloom as vibrantly if forced again. While it’s technically possible, the results may not be as splendid the second time around. If you’re feeling adventurous, you can plant the exhausted bulbs outdoors and they might just bloom in subsequent years, albeit not as grandly.
Q2: Why are my forced tulips not blooming?
Answer: A few factors might be at play. They might not have received sufficient chilling, could’ve been overcrowded, or perhaps the bulbs were unhealthy to begin with. Ensure you’re following the steps carefully and using quality bulbs. Sometimes, nature has its own pace, so a little patience might also be in order.
Q3: How do I choose the best pots for forcing?
Answer: A good pot for forcing has adequate drainage holes to prevent waterlogging. It should also be deep enough to accommodate the bulbs and their roots, usually 4-6 inches deep. Material-wise, terracotta and ceramic pots are fantastic, but plastic ones work too. Just ensure they’re sturdy!
Q4: Can I force other flowers using the same method?
Answer: Many bulbs can be forced, but each has its own set of requirements. Daffodils, hyacinths, and crocuses are some favorites that can be forced similarly. However, always research specific needs for each type. Each flower is like a unique artist with its own backstage demands!
Q5: What is the difference between forcing and regular indoor planting?
Answer: Forcing involves tricking bulbs into thinking it’s spring so they bloom earlier than their natural outdoor cycle. Regular indoor planting doesn’t involve this artificially induced cycle but rather lets plants grow at their own pace, often without the need for a chilling period.
Q6: My tulips have bloomed! Now what?
Answer: Celebrate! Once your tulips have bloomed, maintain them by keeping them out of direct heat and drafts. After blooming, you can choose to compost the bulbs or plant them outdoors for a potential encore in the coming years.
Q7: Do forced tulips need fertilizing?
Answer: Generally, tulip bulbs come packed with all the nutrients they need for one good show. However, if you’re repotting them outdoors afterward, a balanced, slow-release fertilizer can give them a boost.

Forcing tulips indoors is akin to conducting an orchestra, where each instrument (or step) plays a crucial role in creating the final symphony of blooms. With patience, care, and a sprinkle of love, you can transform dormant bulbs into a radiant floral display, no matter the season outside.
