
Alocasias, known for their striking foliage and tropical vibes, have become a popular choice among plant enthusiasts. However, these beauties come with their own set of needs, particularly when it comes to their potting mix. The right mix can make the difference between a thriving Alocasia and one that struggles to survive. In this article, I’ll share my insights and experience on creating the ideal potting mix for your Alocasia plants, helping you keep them healthy and vibrant.
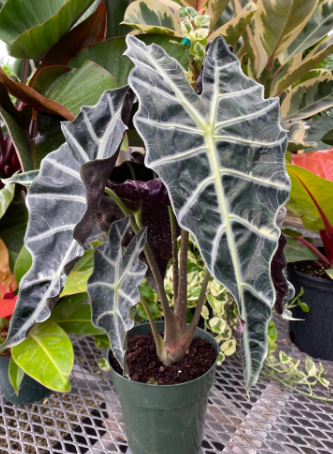
Understanding Alocasia’s Needs
Alocasias are tropical plants that naturally grow in humid environments with well-drained, nutrient-rich soil. Their roots require a balance of moisture retention and aeration to prevent issues like root rot.
Moisture Retention vs. Drainage
One of the biggest challenges with Alocasia care is finding the right balance between moisture retention and drainage. These plants love moisture but hate being waterlogged. A potting mix that retains too much water can lead to root rot, while one that dries out too quickly can cause the plant to dehydrate.
Nutrient Requirements
Alocasias are heavy feeders and thrive in nutrient-rich soil. However, they also need a mix that is not too dense, allowing roots to expand and take in the necessary nutrients without becoming compacted.
Key Ingredients for the Perfect Alocasia Potting Mix
Creating the perfect potting mix for Alocasias involves combining several ingredients that cater to the plant’s needs. Here’s what I recommend:
Peat Moss or Coconut Coir
Both peat moss and coconut coir provide excellent moisture retention while still allowing for adequate drainage. Peat moss is slightly acidic, which can be beneficial for Alocasias, but coconut coir is more sustainable and has a neutral pH.
My Experience:
I’ve used both peat moss and coconut coir for my Alocasias, and I’ve found coconut coir to be a better option. It’s easier to rehydrate and more environmentally friendly.
Perlite or Pumice
Perlite and pumice are essential for improving drainage in the potting mix. They help create air pockets, which allow oxygen to reach the roots, preventing them from becoming waterlogged.
Pro Tip:
Use a higher ratio of perlite or pumice if you notice that your Alocasia’s soil tends to stay too wet between waterings.
Orchid Bark or Pine Bark
Orchid bark or pine bark adds structure to the mix, promoting aeration and preventing compaction. This is particularly important for Alocasias, which need loose soil to allow their roots to grow freely.
Worm Castings or Compost
Alocasias benefit from organic matter like worm castings or compost. These provide essential nutrients and improve the overall texture of the soil.
Author’s Tip:
I like to mix in a handful of worm castings when repotting my Alocasias. It’s a gentle, natural fertilizer that keeps the plants happy without overwhelming them.
Recommended Alocasia Potting Mix Recipe
After experimenting with different combinations, here’s the mix that has worked best for me:
- 40% Peat Moss or Coconut Coir
- 30% Perlite or Pumice
- 20% Orchid Bark or Pine Bark
- 10% Worm Castings or Compost
This mix offers the right balance of moisture retention, drainage, and nutrient availability, ensuring that your Alocasias can thrive.
How to Pot Your Alocasia
Once you have your mix ready, it’s time to pot your Alocasia. Follow these steps to ensure your plant has the best start:
Choosing the Right Pot
Select a pot with drainage holes to prevent water from accumulating at the bottom. Alocasias don’t like to sit in water, so good drainage is crucial.
Filling the Pot
Add a layer of your prepared potting mix to the bottom of the pot. Place your Alocasia in the center, then fill in around the roots with more mix, pressing lightly to eliminate air pockets.
Quick Tip:
Leave about an inch of space from the top of the pot to the soil line. This makes watering easier and prevents overflow.
Watering After Potting
After potting, give your Alocasia a thorough watering to help the soil settle around the roots. Ensure that excess water drains out of the bottom to avoid waterlogging.
Signs of a Healthy Alocasia in the Right Potting Mix
A healthy Alocasia in the right potting mix will show signs of steady growth, with vibrant, green leaves and a firm root system. If your plant is thriving, you should notice:
- New Leaf Growth
Alocasias are known for their rapid leaf production when they’re happy. If you see new leaves unfurling regularly, your plant is likely thriving. - Vibrant Leaf Color
Healthy Alocasia leaves are typically a deep green or variegated, depending on the species. Dull or yellowing leaves may indicate a problem with the soil mix or watering routine. - Strong, Firm Roots
When repotting, check the roots. Healthy roots are white or light brown and firm to the touch. If they’re mushy or dark, it could be a sign of root rot, often caused by poor drainage.
Common Mistakes to Avoid
Even with the perfect potting mix, there are a few common pitfalls to watch out for:
Overwatering
The most common mistake with Alocasias is overwatering. Even with a well-draining mix, too much water can cause root rot. Always allow the top inch of soil to dry out before watering again.
Using the Wrong Soil Mix
Avoid using regular garden soil or heavy potting soils that retain too much moisture. These can lead to compaction and poor drainage, which are detrimental to Alocasias.
Neglecting to Fertilize
While the potting mix provides nutrients, Alocasias are heavy feeders and benefit from regular fertilization during the growing season. Consider a balanced, water-soluble fertilizer every 4-6 weeks.
Conclusion
Crafting the perfect Alocasia potting mix is crucial for keeping these tropical beauties happy and healthy. By combining the right ingredients—peat moss or coconut coir, perlite or pumice, orchid bark, and a touch of organic matter—you can create a mix that provides the ideal balance of moisture retention, drainage, and nutrients.
Remember, the key to successful Alocasia care is not just in the soil but also in how you water and maintain the plant. With the right approach, your Alocasias will reward you with lush, vibrant foliage that brings a touch of the tropics into your home. Happy gardening!
