
Hello, green thumbs and garden enthusiasts! If you’ve stumbled upon this article, chances are you’re wrestling with the dilemma of exposed tree roots wreaking havoc on your otherwise picture-perfect landscape. They’re like that unexpected guest who shows up at your BBQ and just doesn’t mesh with the party vibe. Sure, exposed tree roots can add a touch of natural wilderness to your garden, but let’s be honest—most of the time, they’re more of a tripping hazard than a design feature.
Landscaping around a tree with exposed roots isn’t just a matter of throwing some mulch and calling it a day. It requires special consideration not only to make the area aesthetically pleasing but also to ensure the health and safety of the tree. After all, those roots are exposed for a reason, and the last thing you’d want to do is harm your tree in an attempt to beautify it. But fret not! This article is your comprehensive guide to navigating this rooty ordeal.
Understanding the Problem
Why Tree Roots Get Exposed
Ah, the million-dollar question: why do tree roots rise to the surface like a loch ness monster from the depths? Well, several factors contribute to this rooty revelation.
- Soil Erosion: Over time, wind and water can wash away the top layer of soil, revealing the roots underneath.
- Compacted Soil: Trees find it difficult to grow roots deeply in hard, compacted soil, so they opt for the path of least resistance—upwards!
- Tree Species: Some types of trees, like maples and willows, are just more prone to having surface roots. They’re the extroverts of the tree world.
- Natural Growth: As the tree grows, so does its root system. Sometimes, growth just happens to be in an upward direction.
The Impact on the Tree and Surrounding Landscape
Exposed roots aren’t just an aesthetic challenge; they can also have a real impact on your tree’s health and the surrounding landscape.
- Tree Health: Exposed roots are more susceptible to injury, whether it’s from lawn mowers or foot traffic. Injuries can lead to infections or diseases.
- Soil Quality: Exposed roots can interfere with the aeration and water absorption of the soil, affecting not just the tree but also other plants in the vicinity.
- Safety: They can be a tripping hazard, particularly for young kids or older individuals who may be navigating the garden.
Safety Concerns
Safety first, folks! While exposed roots have that rustic, charming look, they are often anything but charming when you trip over one and find yourself face-to-face with the earth—literally.
- Tripping Hazard: Especially in areas with lots of foot traffic, roots can pose a genuine safety risk.
- Lawnmower Accidents: For those of you who mow your own lawns, maneuvering around roots can be challenging and may result in damaging the roots or your lawnmower.
- Child and Pet Safety: Kids running around and pets digging near exposed roots can result in injury to both the tree and your loved ones.
Material Selection
So, you’re ready to roll up your sleeves and get your hands dirty—literally. But wait! Before you dash to the nearest gardening center to grab the first bag of mulch you see, let’s talk materials. Choosing the right elements can be the difference between a flourishing Eden and a garden horror story.
Types of Mulch to Use and Avoid
Mulch is often the go-to solution for dealing with exposed roots, but not all mulches are created equal.
To Use:
- Organic Mulch: Think wood chips or shredded bark. These not only blend well but also improve soil quality as they decompose.
- Leaf Litter: Your tree drops leaves for a reason. They make excellent, natural mulch.
- Compost: Rich, well-rotted compost can provide nutrients to the tree and surrounding plants.
To Avoid:
- Rubber Mulch: Sure, it lasts forever, but it also doesn’t break down, meaning zero benefit to the soil.
- Dyed Mulch: The chemicals in the dye may not be tree-friendly.
- Too Much Mulch: Remember, mulch volcanoes are a no-go. You want a nice, even layer, not a mountain.
Suitability of Decorative Stones or Pebbles
Who doesn’t love the sleek look of decorative stones or pebbles? They give your garden that modern, zen-like vibe. However, stones can retain heat, which might not be the best for your tree’s roots on those scorching summer days. If you do go the rock route:
- Opt for Lighter Stones: These absorb less heat.
- Create a Buffer: Use a layer of fabric or plastic as a barrier between the roots and the rocks.
The Role of Native Plants
Ah, native plants, the unsung heroes of any garden. These are not only drought-resistant and local wildlife-friendly but can also coexist happily with your tree’s roots.
- Low-Maintenance: Once established, they often need less care than non-native species.
- Soil Erosion: Their root systems can help prevent further soil erosion.
- Natural Beauty: Native plants can make your tree with exposed roots look like a planned garden feature, not a landscaping faux pas.
Design Ideas
Now that we’ve got our materials sorted, let’s unleash our inner garden designers! Whether you’re a minimalist at heart or someone who loves a lush, vibrant setting, there’s a design idea that can turn those awkward exposed roots into the centerpiece of your garden. Here are some design inspirations to consider:
The Mulch Ring: Creating a Mulch Ring Around the Tree
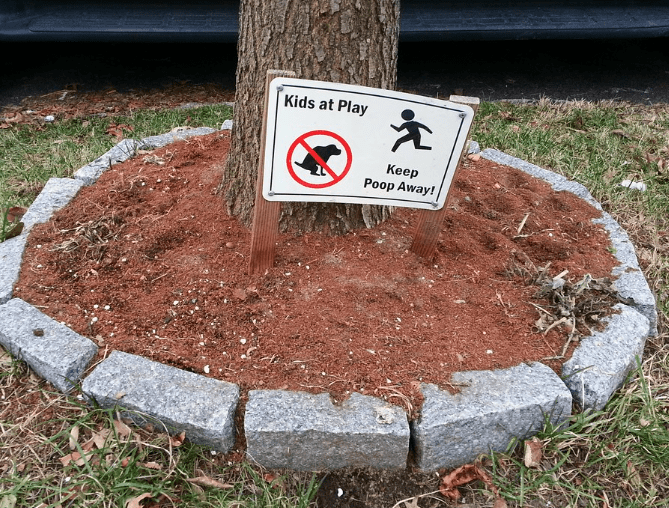
If you’re looking for an easy yet effective solution, consider a mulch ring. A circular bed of mulch around the tree can not only look pleasing but also serve the practical purpose of keeping those roots safe and sound.

- Design: Aim for a symmetrical circle or an oval, avoiding the “mulch volcano.”
- Depth: Keep the mulch about 2-4 inches deep.
- Edge: A little border of stones or bricks can add a finishing touch.
The Garden Bed: Making a Raised Bed of Flowers or Low-Lying Shrubs
Why not turn a problem into a feature? Create a raised bed around your tree, filling it with flowers or low-lying shrubs.

- Plant Selection: Opt for plants that are tolerant of shade and root competition.
- Height: Keep the bed low to avoid suffocating the roots.
- Design: A tiered bed can create depth and visual interest.
Stepping Stones: Incorporating Walkways or Paths
Incorporate stepping stones to guide visitors around the tree, creating a whimsical path that can be both functional and charming.
- Material: Choose flat stones for easier walking.
- Layout: Plan the layout carefully to avoid damaging the roots.
- Accents: Moss or low ground cover between the stones can soften the look.
Natural Look: Using Native Plants to Blend the Roots into the Landscape
If you prefer a more natural setting, use native plants to blend the roots into your existing landscape.

- Plant Selection: Opt for native plants that are unobtrusive and can coexist with the tree.
- Placement: Intersperse plants between the roots, creating a cohesive look.
- Texture: Different leaf shapes and sizes can add texture and depth to the area.
The Zen Approach: Minimalistic Designs Using Sand and Rocks
If less is more in your book, then a Zen-inspired design might be up your alley.
- Base: Use a thin layer of sand as your canvas.
- Rocks: Select a variety of rocks and stones to create miniature landscapes.
- Simplicity: A single bonsai or dwarf shrub can serve as the perfect centerpiece for your Zen garden.
Step-by-Step Implementation
Alright, green thumbs, it’s action time! You’ve got your design sketched out on the back of an envelope, your materials are sitting in your garden shed, and you’re itching to get started. Here’s a step-by-step guide to take you from exposed roots to exposed… brilliance! Let’s dive in.
Preparing the Area: Cleaning, Measuring, and Marking
Before you start throwing mulch and planting flowers willy-nilly, you’ve got to prepare the battlefield—I mean, the garden area.


- Cleaning: Remove any loose debris, leaves, or weeds from around the exposed roots.
- Measuring: Use a measuring tape to define the size of the area you’re working on. This will help you buy the right amount of materials.
- Marking: Use landscape marking paint or even just simple wooden stakes and string to outline your design area.
Pro Tip: A prepared garden is a happy garden. The more accurately you measure, the less likely you’ll run out of materials halfway through.
Installation of Chosen Materials: A Detailed Guide
Now comes the fun part. Below is a table outlining how to install different types of materials.
| Material | Installation Steps |
|---|---|
| Mulch | – Spread a 2-4 inch layer evenly around the roots. |
| – Keep mulch a few inches away from the trunk to avoid rot. | |
| Stones | – Lay down a fabric barrier over the roots. |
| – Place stones carefully on top, avoiding direct pressure on roots. | |
| Plants | – Dig holes between the roots, taking care not to damage them. |
| – Plant and lightly tamp down the soil. | |
| Stepping Stones | – Place stones in a pre-planned pattern. |
| – Fill gaps with moss or low ground cover. | |
| Sand (Zen) | – Carefully spread a thin layer of sand, using a rake for even distribution. |
| – Place rocks and additional elements as per your design. |
Maintenance Tips
You’ve put in the hard work; now let’s make sure it stays picture-perfect.
- Watering: Remember, too much water can lead to root rot, and too little can lead to drought. Balance is key.
- Weeding: Keep an eye out for those sneaky weeds that can ruin your masterpiece.
- Mulch Check: Organic mulch will decompose. Make it a yearly habit to check and refresh your mulch layer.
- Stone Cleaning: If you’ve used stones, a simple rinse every now and then can keep them looking new.
Pro Tip: A little maintenance goes a long way. A few minutes every weekend can save you hours of overhaul later.
And there you have it, folks! Your step-by-step guide to turning that rooty eyesore into the belle of the garden ball!
Comprehensive Q&A
Gardening is a bit like playing 20 questions—there’s always something you’re pondering. To keep you from scratching your head while you should be digging in the soil, here’s a comprehensive Q&A that should answer most, if not all, of your burning questions.
Is it safe to cover exposed tree roots with soil?
Ah, the old “out of sight, out of mind” strategy. While it might be tempting to just dump soil over those pesky exposed roots, doing so could suffocate the tree and lead to rot. So, in short, it’s generally not recommended.
Can I use herbicides near exposed roots?
Herbicides are a double-edged sword. While they can keep the weeds at bay, they can also harm your tree if its roots absorb the chemicals. If you must use herbicides, opt for selective types and apply them carefully.
What kinds of mulch are safest for my tree?
Organic mulches like wood chips, shredded bark, or leaf litter are usually the safest bets. They break down over time, improving soil quality, and they don’t pose the same risks as rubber or dyed mulches.
How often should I water my tree with a landscaped area around it?
Watering depends on the type of tree, the climate, and the other plants in the area. However, a general rule of thumb is to keep the soil moist but not waterlogged. It’s best to consult local gardening experts for advice tailored to your specific situation.
Can I install a seating area near a tree with exposed roots?
Yes, you can, but proceed with caution. Make sure the seating doesn’t put pressure on the roots or disturb the soil too much. Elevated seating options might be a good route to explore.
What types of plants are safe to plant near exposed tree roots?
Go for shade-tolerant, shallow-rooted plants like hostas, ferns, or ground covers like vinca. These plants are less likely to compete aggressively with your tree for nutrients and water.
How do I know if my landscaping efforts are harming the tree?
Signs of stress in a tree can include yellowing leaves, reduced growth, or visible signs of disease like mold or fungi. If you notice these, consult an arborist for an expert opinion.
Can landscaping around exposed roots lead to pests or diseases?
Improper landscaping can create environments that attract pests or promote diseases. For example, overly wet soil may invite root rot. Always follow best practices to minimize these risks.
How can I landscape around a tree on a slope?
Sloped areas present erosion risks. In this case, consider terracing or using ground covers that can help hold the soil. Make sure any mulch or soil amendments won’t easily wash away.
Is it possible to remove exposed roots?
Technically yes, but it’s risky business. Removing large roots can compromise the tree’s stability and health. If roots are posing a significant problem, it’s best to consult with a professional arborist.
